You can build standalone events, as well as events that are satellite events of a central theme (‘coordinated events”), right in AddUp. Once built, you can add them to your AddUp campaign, download information about supporters who’ve RSVP'd, and email them with updates.
As a reminder, any event you build in Salesforce or Campfire Events will also show up in AddUp, both on the AddUp events search page (as long as they have a physical location), and will be available to add to your AddUp campaign.
Creating a new event in AddUp
-
Log into your AddUp account by going to AddUp.org and then clicking "Register" (if you don't have an AddUp account) or "Log In" if you do. Then navigate back to AddUp.org, log in, and click “My Events” or “My Campaigns/Events” (it may just say "My Events") in the top navigation.
-

-
When the AddUp campaign management homepage loads, Click “Events” in the top navigation bar. Then, in the dropdown menu, click “+Start an Event.”

-
Add an Event Title: A short and descriptive title for your event

-
Add Event Category & Event Type: By toggling between Social Event, Activist Event, and Sierra Club Support Event, different Event Types will appear. If you are not finding an applicable Event Type, switch Event Categories and see if a different category has your desired Event Type. (Note: only certain level of users will see all these options. If you don’t see them, don’t worry. Pick from what you see.)
-

-
Enter Event Sponsor: Here you can select which Sierra Club club entity (Chapter, Group, volunteer team, or National) you are organizing this event on behalf of. If you are not a part of any existing Sierra Club entity, select “National” and name your own group in the Event Sponsor Description field. (Note: Not all users will see sponsorship as a field)
Ready For 100 volunteer? Select “Ready For 100 Distributed Volunteers.”

If desired, edit the Event Sponsor Description: If you need to change how the Event Sponsor is named publicly -- say, mention the broader coalition you’re a part of, or some of your organizational partners -- this is where you can write your own sponsor description for supporters to see.
-
Event Funding Type: Is this a C3 or C4 event? 501(c)3 activity is generally everything that is not associated with lobbying for new legislation. 501(c)4 activity is generally focused on passing new legislation via an elected body (city councils, state legislature, Congress) or through a ballot measure. (Note: not all users will see the funding type)
-
Part of a coordinated event? Leave this as no for a standalone event.
-
Location Type? You can choose “In-Person” or “Virtual.” If you select “Virtual”, a new field, “Webinar or Livestream URL,” will appear below the “Event Location” section. You can paste in your Zoom, Hangout, or livestream URL which will appear publicly on your event page.
-
Event Location (optional): Put exactly where your event will take place (or where participants are to initially meet) in address form here. If you are running a virtual event, but it’s still pertaining to something local, regional, or state-wide in scale, put an event address in here (even if it’s just “Maine” or “Portland, Maine”) so that AddUp can still recommend the event to nearby folks.

-
Start & End Date and Time: The specific start day and time, as well as the specific end date and time, of your event.
-
Event Image (optional): This is the main image that will represent your event on its landing page, on social media shares, and as a thumbnail throughout the AddUp site (including on your AddUp campaign). Images must be horizontal (not vertical or square), at least 800 pixels wide, and it’s preferred they’re photos (versus logos or graphics). If you don’t select an image, AddUp will upload a default image of people backpacking.
Please make sure this is a photo you have the rights to use, and that you give appropriate credit at the bottom of the “Why This Campaign Matters” section (ex. “Photo credit: Khun Hans (CC BY-NC-ND 2.0)” ).
Need helping finding an image? Crediting it appropriately? Click here then scroll down to "How do I find free, high-quality images for my AddUp campaign?" in the "Start a new AddUp campaign" section.
-
Event Video (optional): The video will show up at the top of your event. Enter a full YouTube or Vimeo URL.
-
Event Summary: A quick, concise description of your event. This is the most detailed information potential attendees will see when your event is featured on a AddUp campaign.
Character limit: 210 characters. -
Event Full Description: Add a few paragraphs to let people know why this event is important and how taking action can make a difference. This is the main section of information potential attendees will see before considering whether or not to register for your event.
Character limit: 2200
-
Post Sign-Up Instructions: Add any details (extra directions, things to bring, etc.) to let people know after they sign up to attend your event.
Character limit: 2200
-
Contact name: Your name, or the name of the event leader. It will appear publicly on your AddUp event page as the “event leader.”
-
Contact email: Your email, or the email of the event leader. They can receive notification emails about each event registration as they come in.
-
Contact phone (optional): Your phone number, or the phone number of the event leader (if you choose to share it).
-
Receive Email Notifications? Leaving this at “yes” will ensure that, each time someone RSVPs for your event, an individual notification email will go to the Contact Email of the event leader.
-
Private Event? If you need to have a place for people to register for your event, but you don’t want it visible to other people across AddUp, toggle this to “Yes.”
-
Click Submit. At this point, your event will go to the AddUp team to review for approval, which should take less than 24 hours. If you instead see “Publish,” you have permissions to publish the event live with no approval process.
A Coordinated Event is how we refer to a group of events that share a common theme and goal which are happening around the same time, but not always in the same location. They're days or weeks of action like the Climate Strike or March for Science. If you see a Coordinated Event on AddUp, you can add your own local action and be part of the movement!
-
Go to the AddUp campaign management homepage loads, Click “Events” in the top navigation bar. Then, in the dropdown menu, click “+Start an Event.”
-
Scroll down a little until you see, “Part of a Coordinated Event?” Flip the toggle to “Yes”
-
In the search box, search for the name of the Coordinated Event and click “Add”.
-
Selecting a “Coordinated Event” will automatically fill some of your fields, such as event name and description. You can edit these as desired. Some of these fields are above this toggle, so make sure you scroll back up. Edit the Event Title at the top of the page to a short name that includes where your event will be held.
-
Enter the Start Date and Time and End Date and Time.
-
Edit the Event Full Description to include the event date, time, and location. The template will likely have things to replace, like [DATE] and [PLACE NAME]. Make sure to change all of these.
- Complete any missing fields and adjust other fields as desired.
- Time to submit (or Publish) your AddUp event! If the "Submit" or "Publish" is grayed out, click it anyways. It'll let you know what fields haven't been filled out. Fill those out and the "Submit" or "Publish" button should turn orange. Then you can click it!
- If the AddUp team has no concerns with your event, they will publish it and you will be able to access it from going to the AddUp campaign & event management homepage (or going to AddUp.org and clicking "My Events" or "My Campaigns/Events" in the top navigation bar) and then "Campaigns" at the top navigation bar followed by "Manage Campaigns" from the dropdown menu.
If there are edits the AddUp team requests you make before the event can go live, you will get an email notification from the AddUP team. In “Your Events” list on the Campaign Management dashboard, the status of your event will read “Edits Requested.” Click “Edit.”
You will see a comment with the suggested changes. Make the suggested changes and hit “Resubmit.” This process will continue until the creator approves the event. You can see a history in “Feedback History.”
Once your event is live, head to the AddUp campaign management homepage, navigate to “Events” in the top navigation bar. Then click “Manage Events” in the dropdown menu. You can head to your event's Dashboard by clicking on the individual event title or the "Dashboard" link next to the title.
Questions? Email AddUp@SierraClub.org
Managing & promoting a live AddUp event
- Head to AddUp.org and log in. At the top of the page, click "My Campaigns/Events" or "My Events," whichever you see.
- From the AddUp campaigns & event management homepage, click "Events" at the top, then "Manage Events" from the dropdown menu.
- Under the "Your Events" list, click the Event Title or Dashboard link of the event you want to access.
- You made it! Well done.
Your AddUp event dashboard allows you to do the following things:
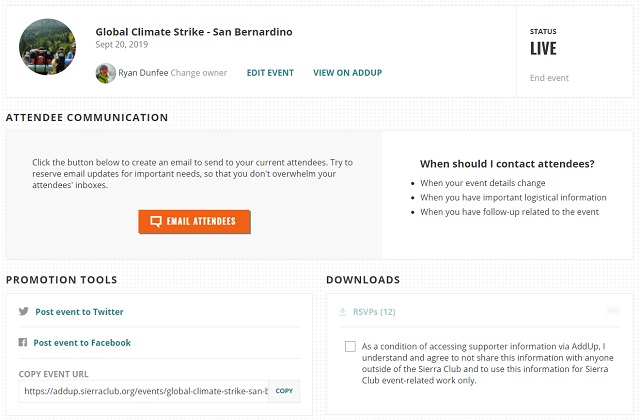
- At the top of the Dashboard, you can Change Owner to switch the event ownership to someone else you're working with. Click "Edit Event" to edit the details of your existing event, or "View on AddUp" to see how it currently looks for the public. You can also see the Event Status to the right, with the option to "End Event" if you want to cancel it (you can always relaunch it later).
- By clicking "Email Attendees" under Attendee Management, you can send a quick update to anyone who has RSVP'ed on AddUp for your event -- maybe there's a location change or you want to remind folks about the upcoming event a day before it starts. This is similar to the Campaign Update in that it'll get automaticaly emailed out, although the update details will show directly in your attendees' inboxes and not on the event page itself.
- Promotion Tools allow you to share a link to your campaign directly to your personal Twitter or Facebook page, or you can copy a link/URL of your event for sharing elsewhere (like in an email).
- Downloads allows you to download a spreadsheet with information about anyone who has RSVP'ed to your event, which will email you a link to a spreadsheet with that information.
-
From the AddUp campaign management homepage, navigate to “Events” in the top navigation bar. Then click “Manage Events” in the dropdown menu.
-
If the status of your event reads “Live,” click the arrow next to “Dashboard” to see other options. Click on “Edit.”
- Make any necessary edits, then click "Publish Changes" in the upper righthand corner.
Questions? Email AddUp@SierraClub.org.
- Head to your event Dashboard by heading to the AddUp campaign & event management homepage, then "Events" at the top and "Manage Events" from the dropdown menu.
- From the list of your events, click the event title or the Dashboard link of the event you want to promote.
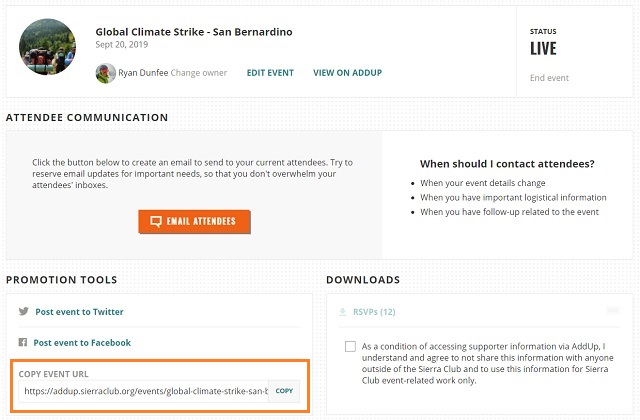
- From the event's dashboard, click the "copy event URL" button at the bottom left. Now you can use this to share your event on social media, in an email, etc!
To include your new AddUp event as part of an AddUp campaign, click here then scroll down to "How to add events to your campaign" under "Adding actions to your campaign section."
To promote your new AddUp event through a Marketing Cloud email, click here then scroll down to "How do I promote my AddUp Campaign through a Salesforce Promotion and Marketing Cloud email?" While the instructions are for promoting an AddUp campaign, you can use the link to your event (gotten from the event Dashboard) as in the link for your Salesforce Promotion and follow the instructions from there.
Questions? Email AddUp@SierraClub.org.
You are able to download a .CSV spreadsheet with the contact information of people who have registered for your event.
-
From the AddUp campaign management homepage, navigate to “Events” in the top navigation bar. Then click “Manage Events” in the dropdown menu.
-
For the event you're looking into, click on the button that reads "Dashboard" or the event title.
-
Find the box labeled "Downloads" and click in the checkbox to agree to the terms for accessing your attendees' data.
-
After you click the checkbox, the RSVPs link will activate (as long as at least one person has RSVP'ed). Click on it; AddUp will send you a link to your downloadable spreadsheet to your email inbox.
Questions? Email AddUp@SierraClub.org.
Any event built in Salesforce or Campfire Events will automatically show up in AddUp. However it will get assigned to an anonymous user, so if you want to edit how it appears on AddUp, we'll need to reassign it to you. Please make sure you've already created an AddUp account -- guidance for that is as the start of the "How do I create an event in AddUp?" section at the top of this page. Then email the AddUp team at AddUp@SierraClub.org with a link to the event you want reassigned to you.
-
From the AddUp campaign management homepage, navigate to “Events” in the top navigation bar. Then click “Manage Events” in the dropdown menu.
-
Navigate to the event you want to send an update about, and click the event title or Dashboard.
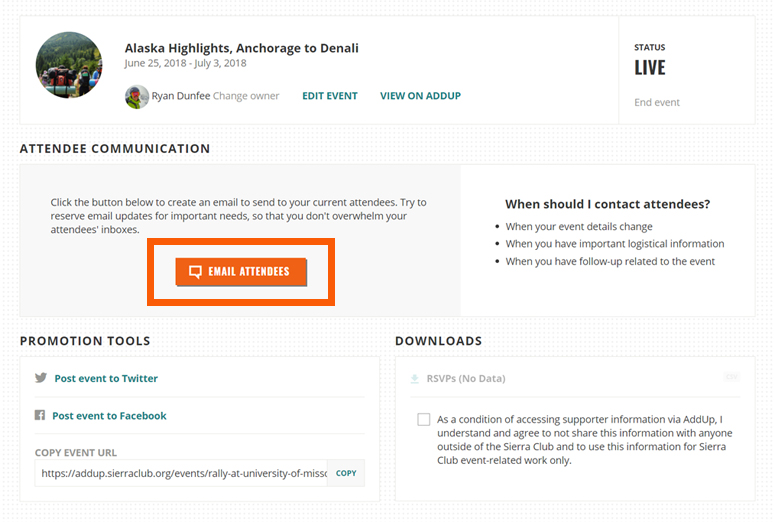
- In the event Dashboard, click "Email Attendees" under Attendee Communication:
- Write your Subject line and Update email. Just like in the Campaign Update, "B" will bold text, "I" will italicize text, "U" will underline text, and, after highlighting text you want to hyperlink, you can click "L" to link it.
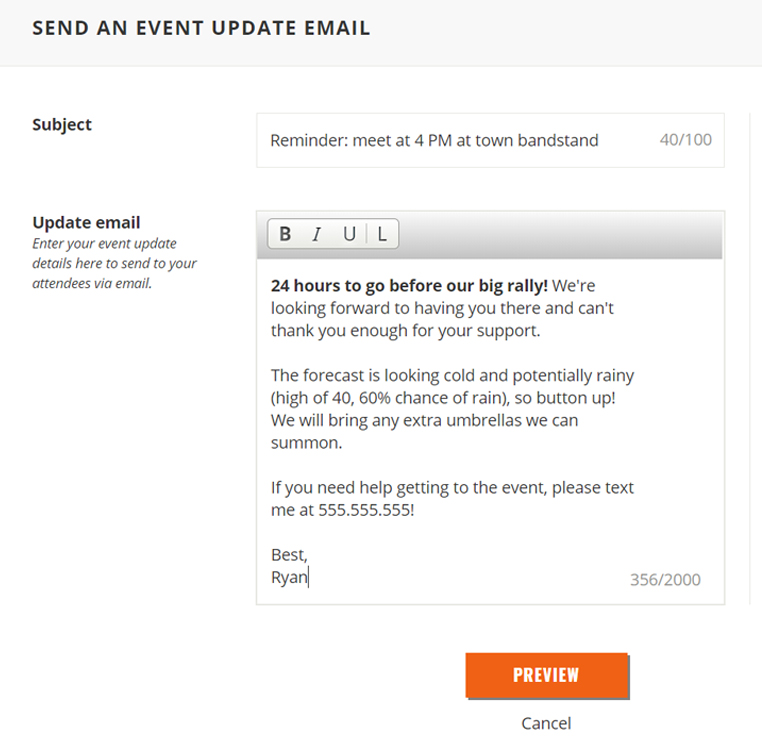
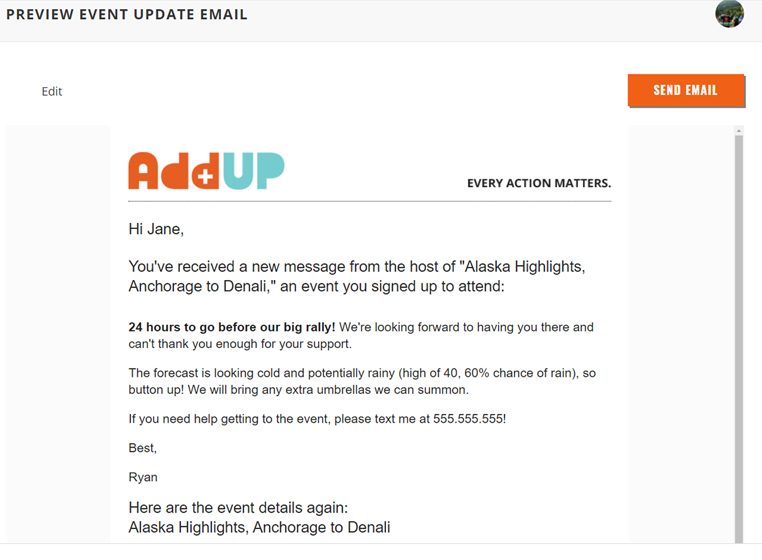
- Click "Preview." A preview view of what your update will look like in your attendees' inboxes will be generated. If you need to make any changes, click "Edit." Otherwise click "Send Email" and an email will be automatically sent to anyone who's RSVP'ed for your event on AddUp!
Questions? Email AddUp@SierraClub.org.