Tennis Table
A pair of wooden rackets serves up a sporty side table


In the mid-'80s, I replaced my clunky wooden tennis racket with a lightweight graphite one. It was like getting a bionic arm, and I was just a teenage amateur. Nowadays, professional tennis players routinely pound out serves over 100 miles an hour with rackets crafted from space-age materials.
But lots of people still have a soft spot for wooden rackets. If you're one of them, you can dust yours off and sign up for a "woody tournament." They're cropping up all over. One of the most established (but invitation only) is the annual Woody Tennis Championships, which just completed its 22nd year and is held on grass courts in La Quinta, California.
Or you can do what I did and turn these relics into something that displays their vintage charm in a modern, functional way: a small side table.
I sawed off the heads and nailed them at a 90-degree angle to the handles. Then I screwed the two heads together to form the tabletop. Last, I attached them to a sturdy base that I crafted from the original presses. Now they score points in the living room.
Based on a project by Nicholas Torretta at viraroque.blogspot.com
DIFFICULTY LEVEL: 7 | CONSTRUCTION TIME: 5 hours
No specialized woodworking skills required—assuming you can saw, drill, and hammer.
For the table:
- 2 wooden tennis rackets (the same size and shape)
- Saw
- Miter box or clamps (to ensure a smooth cut)
- Drill Hammer
- 2 nails (1 inch)
- Measuring tape or ruler
- Wood glue
- Sandpaper or sanding block
- 1 machine screw (1 inch) and corresponding nut
- Tape
For the base:
- 2 wooden presses (the same size and shape)
- 2 large flathead wood screws (to attach the base to the racket handles)
- 2 small brackets (to connect the presses together)*
- 4 machine screws (sized to fit through brackets and presses) and corresponding wing nuts
- 2 machine screws (sized to fit through presses) and two corresponding wing nuts**
* I used two 2-inch L brackets and sawed off the extraneous metal pieces.
** For a nice touch, you can size these two screws to fit the wing nuts that came with the presses.
Step 1: Saw the tennis racket heads off as close to their base as possible. The racket handles should be the same length. Sand smooth if necessary.

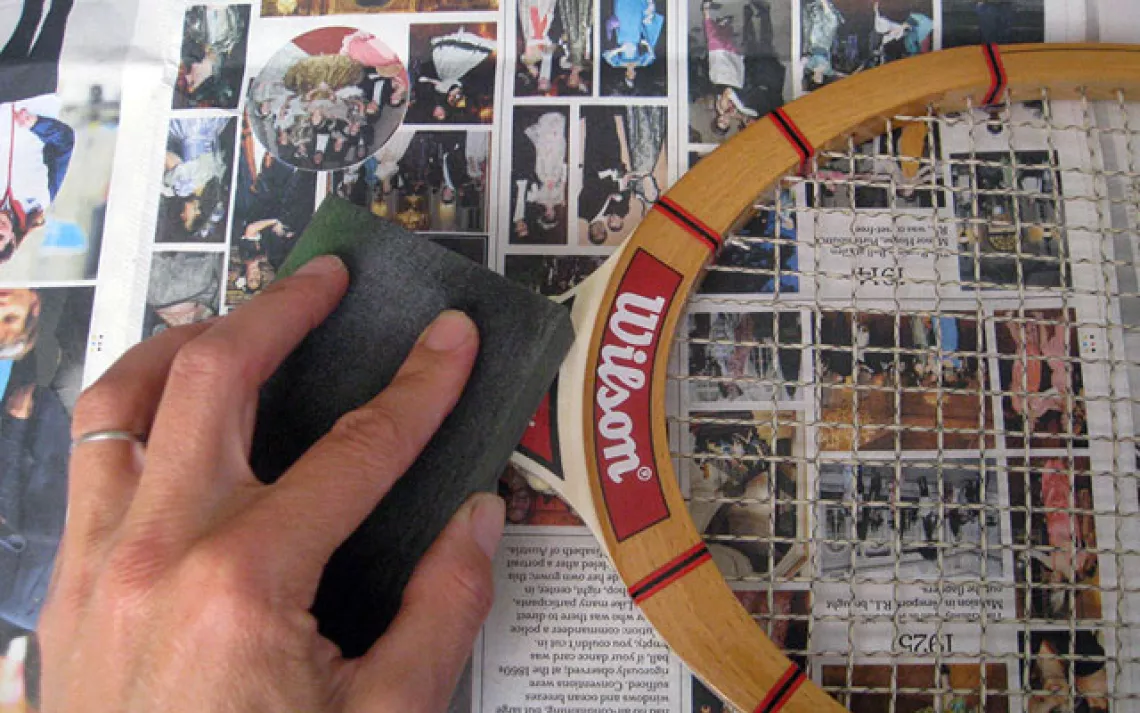
Step 2: Sand off the varnish on one side of each racket head so that the wood glue will adhere.
Step 3: Apply the glue and attach the handles to the racket heads at a 90-degree angle.
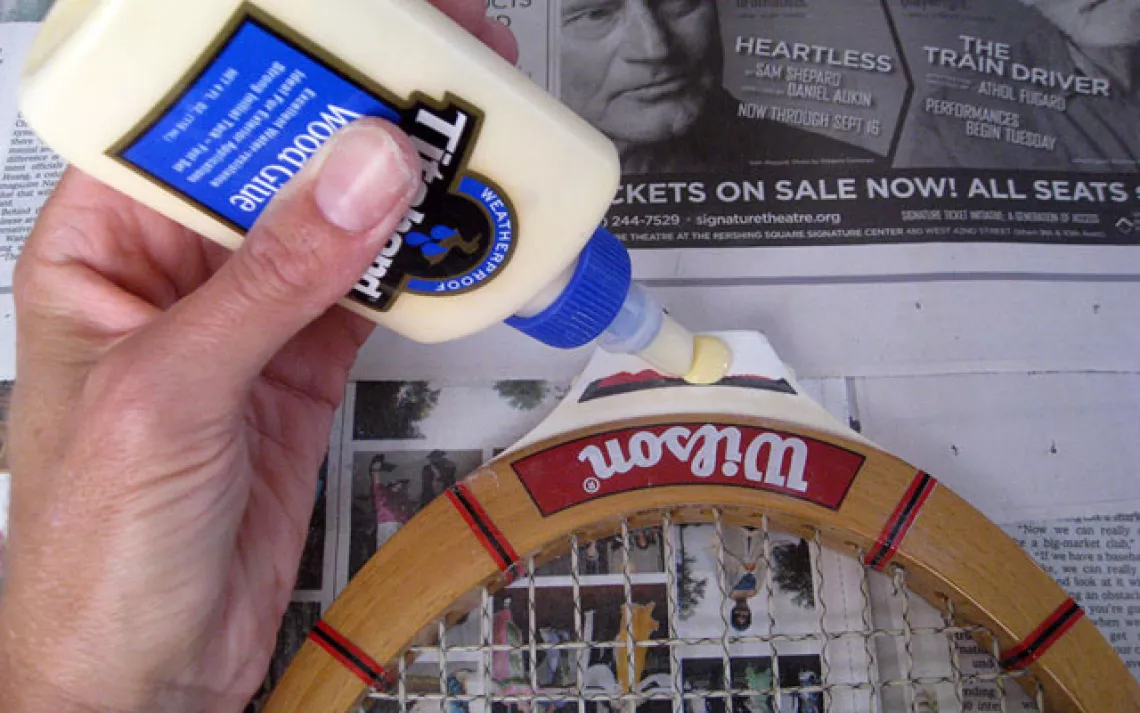
Step 4: Wipe away any excess glue with a rag. Tape the handles and heads together to help hold them place and let them dry for several hours.

Step 5: Once the glue has dried, carefully drill a hole at the top of each racket head down into the handle.

Step 6: Gently hammer a nail into each hole.

Step 7: Remove the original nuts and screws that hold the presses together. Lay the presses side by side in opposite directions so they fit together snugly. Position a bracket at one end so that its holes line up with the holes in the presses and screw in two flathead machine screws.

Step 8: Flip the presses over and screw on the corresponding nuts. Repeat steps 7 and 8 at the other end.

Step 9: Before you add screws to the four remaining corners of the base, you need to widen the holes a bit, or else your screws will not be flush with the wood and your table will wobble. Use a large drill bit to do this (test the right depth as you go along by inserting the wood screws).

Step 10: Decide which two diagonally facing corners will be attached to the tennis racket handles (your flathead wood screws will go in these two holes). Insert two machine screws into the holes that will NOT attach to the base and tightly screw on the corresponding nuts.

Step 11: Lay the rackets flat and place the base on top of the handles to gauge the spot where the rackets should attach to each other. Mark this spot with a pencil, then carefully drill a small hole through the side of each racket. Screw in a wood screw and corresponding nut.

Step 12: Place the base on top of the racket handles again and mark the spot where the corner hole of each press meets the bottom of each racket handle. Drill a hole in the bottom of each racket handle.

Step 13: Attach the base to the racket handles at each corner with the wood screws.

Step 14: Flip over and enjoy your new tennis racket table.